


(Top) Closed-end rice paper rolls. (Bottom) Opened-end rice paper roll.
Rarely does a week go by when I don't use rice paper. Called bánh tráng, rice paper is among the main staples in the Vietnamese kitchen. Think of all the goi cuon rice paper rolls (a.k.a, summer rolls and salad rolls) and the sinfully delicious fried imperial rolls called cha gio that you've eaten. They're encased in translucent rice paper. If you're new to Vietnamese food, chances are that someone else pre-rolled the rice paper rolls for you. Ever thought of rolling your own?
If you've never wrapped with Vietnamese rice paper, don't be daunted. Wrapping rice paper rolls is like making a burrito and you don't have to be perfect. Buy some good rice paper (see rice paper buying tips for guidance) and then review these helpful hints before diving in:
Have water handy. To make rice paper pliable and usable, just use water. I typically fill a wide shallow bowl partway with water; a baking dish may be substituted. The water temperature depends on the type of rice paper. In general, thinner rice paper requires cooler water. When making hand rolls at the table, set out one or two communal dipping bowls for guests. If the papers require hot water, consider using a portable electric burner. Warm it up in advance and boil the water on the stove first. Then pour the hot water into a wide shallow pan and set it on the electric burner.
 Dip by sliding or rotating. When dipping rice papers in water, aim to moderately wet (not completely softened) both sides. Horizontally slide or rotate each rice paper. If rice paper lingers in water for too long, it goes limp and may collapse on itself and stick. After dipping, put the paper on a flat work surface. If you're making a bunch of rolls in advance of serving, work in batches and use a large work surface like a cutting board, inverted baking sheet, tray, or dishtowel. For do-it-yourself hand rolls that are part of a meal, have guests put wet rice papers on their dinner plates.
Wait for the right moment. After a rice paper is dipped, it takes a minute or two to fully soften and become usable. It's ready for wrapping and rolling when it's pliable and slightly tacky - like a Post-it note. Sip a beverage or have conversation as you wait. Dining Vietnamese style is a social activity and the wait time is great for gossiping, trading rice paper wrapping techniques, etc.
Wrap like a burrito. When wrapping with a rice paper circle, mentally divide it up into 3 -- horizontal if you're doing the closed end method #1, and vertical if you're doing the open-end method #2. Center the filling in the bottom third or center, respectively. Bring the lower edge up over the filling, then fold in the two side flaps, and then roll the entire thing up. With triangles, position the curved edge closest to you and follow the same guidelines for positioning your filling and wrapping. Below are details for working with 8 ½-inch-wide rice paper circles, the most common shape and size; if you use small or large circles of rice paper, the idea is just the same.
HOW TO WRAP RICE PAPER ROLLS
METHOD 1: CLOSED-ENDS RICE PAPER ROLLS
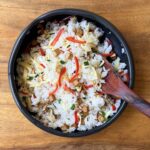
It's the classic presentation and very pretty. You horizontally place the filling ingredients.


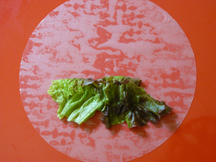
Regardless of how you wrap something up in rice paper, remember to tear off the
stiff spine from the lettuce leaf before
laying it down on the rice paper, lest
your roll tears. Herb leaves
should be torn off their stem or torn into small
bite-size pieces. Also, don't over stuff or the roll may burst. How you layer
the ingredients does not matter too much, though do consider how
you want to experience the flavors. In general, ingredients should be
shaped as thin and long to conform to the shape of the roll.


After placing the filling, pull up the bottom flap of the rice paper, making sure you
go over the filling. Give it a full roll (photo #2) to make sure that the rice paper roll
is secure, then fold in the side flaps (photo #3). If you want to place
shrimp in the rolls (as for goi cuon salad/summer rolls), do it now, orange side
facing down. (You can also place the shrimp in before folding in the side flaps.)


Hard-core, traditional rice paper rollers may want to place some garlic chives (he)
after the shrimp are placed. After that, it's time to roll everything up to close. If
garlic chives are part of the roll, trim them with scissors so that there's
about 1-inch of garlic chive protruding (it's part of the charm).
That's a classic version of the goi cuon salad/summer rolls.
METHOD #2: OPENED-END RICE PAPER ROLLS
more into the rolls, they can be a bit sloppy and you can drizzle sauce right into the top.


Center the ingredients vertically, layered however you'd like,
positioned about 2 inches from the lower edged. Note that I've
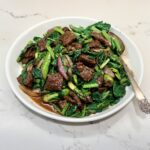
added some pickled daikon and carrot for tang and crunch. The meat is
sliced leftover grilled lemongrass pork (same as above). Pull up the
bottom so there's good support. Then roll up the rice paper from
one side to the other (I go from left to right). You're done. Eat!
Final words of encouragement: If you mess up, remember that rice paper is forgiving. Plus, an 8- or 12-ounce package contains plenty of papers for you to practice with in your initial forays. Boo-boos are yours to eat!
Additional information:
Need something quick and easy for dipping your rice paper rolls? Try the basic Vietnamese fish sauce dipping sauce called nuoc cham.
A few things you can roll up in rice paper:
- Grilled Shrimp on Sugarcane (chao tom)
- Vietnamese Restaurant-style Grilled Lemongrass Pork (thit heo nuong xa)
- Korean-Vietnamese Grilled Pork Belly (add a few carbs for an extra layer of flavor!)
- Pickled daikon and carrot (do chua) adds nice tang
- Round rice noodles (Bun)
Also check the Recipe Index for more ideas.
If you need brand recommendations and guidance, see the rice paper buying tips post!
Have any special techniques to add? Don't hold them to yourself. Do share!

Kim says
Oh! This reminds me of learning how to eat bo nhung dam as a kid. Mom would double up on rice paper when we were first learning how to wrap the beef + all the herbs in rice paper -- it is less likely to tear that way. Great post!
P.S. I hope this comment didn't post twice, I had an issue the first time.
Andrea Nguyen says
That's great, Kim. We all need training wheels and sometimes, I need a refresher course too!
Nope, you didn't respond twice!
Mia says
Try dipping the rice papers in cold beer for a little extra flavor. A technique I learned from my dad.
The Duo Dishes says
We'd love to make rolls like this, but the technique freaked us out a bit. Guess it's worth a try. Thanks for sharing!
Pho 80 says
Banh Trang (rice paper) is unique to Vietnamese people. We like to roll our food in rice papers and eat them. Our family eat rice paper rolls every weekends. Our favorite brand of rice paper is the one with drawing of a long hair Vietnamese lady in ao dai (traditional Vietnamese dress).
alecho says
I am soooo glad I found this blog! I'm learning how to make an awesome spring roll to impress a girl I like. She likes spring rolls, but I've never made one before. thanx! I've added this blog to my rss reader! 🙂
Andrea Nguyen says
Mia -- do you dip in the beer for making fried cha gio imperial rolls?
Pho 80 -- that's the 3 Ladies Brand, my favorite too! Reliable stuff.
Alecho -- Now you've got the technique to get the girl!
Serenity says
I have a question regarding these rolls.
What's the best way to keep them fresh ?
Let's say I would like to make some for the next day. Do I keep it covered and in the fridge? Or do I keep them covered but out ?
I've had disasters both ways.
Thanks in advance!
Mia says
Andrea dip in beer for goi cuon. Haven't tried it for fried cha gio.
Andrea Nguyen says
Serenity -- you can keep rice paper rolls soft and chewy for several hours, covered in plastic wrap, at room temperature. They don't do well sitting overnight as the rice paper can come apart if there's excess moisture and the rice paper is on the thin side. If you refrigerate them -- like you may see at specialty food stores -- the rice paper hardens over time and becomes plastic-like. So your best bet is to make them the day you eat them. I like to set up a do-it-yourself situation and have people make their own at the table.
Mia -- that's a new one on me. I've heard of beer for cha gio, but not for goi cuon. So do you warm the beer or does it not matter? What kind of rice paper are you using?
Corey says
I just made rice paper rolls myself for the first time and it went so smoothly thanks to your expert advice. Mine weren't nearly as beautiful as the ones in your pictures, but they stayed together nicely. Your instructions are so wonderfully specific (tacky like a post-it note - exactly!); I don't know what I would have done on my own!
Sue says
I just bought a package to try for myself. After reading your comments, do I need to use the whole package at once? Is it possible to take out one, and keep the rest to hydrate at another time?
Brittany says
Sue, when you open the package grab out only what you want, they are dried seperatly and you can use the rest some other time 🙂
Eunice E. Ellison says
I tried rice paper rolls for the first time, when I served them a few hrs later the rice paper was very stickey, what can I do to prevent his.
thanks
Taobao buy says
That's not his. Steve's is black*_*
Rachel says
I often get these at trader joe's at least the shrimp ones they are sooo good. I love them.
Taobao buy says
* be happy together is good enough. I am not asking for things that I could never get.
Cheap Coach Bags says
Great article. Welcom to the Cheap Coach Bags when you have free time! There are many kinds shoes on the website!
Business Coach says
You may believe these four proverbs:
Life is not all beer and skittles.
Other man live to eat, while I eat to live.
Life is the art of drawing sufficient conclusions from insufficient premises.
Live as though you intend to live forever, and work as though your strength were limit less.
Marie says
I love making rice paper rolls, I sometimes make them the night before for my lunch at work the following day. I store them in a plastic container lined with dampened paper towels in the fridge, keeps them from drying out or cracking. Works great for me.
lat says
Thx for all the info..I made lot of wraps, my kids love them..any idea of how to keep the left over fresh?
cheap jordans canada says
Aside from the terrific taste, this steak has two big advantages. First, it's extremely affordable. Flank steak is a much cheaper cut than other steaks, like rib-eyes or T-bones. Our flank steak was enough food for four people, and it cost us less than $8 total.
Second, this recipe is extremely quick to pull together. You could easily go from start to finish in under 20 minutes, making this an ideal dish for a quick weeknight dinner. Glazing the steak turns out to be a huge time-saving shortcut: You get all the deep, flavorful tastes of a marinated piece of meat, without any of the wait.
custom essay writing services says
This article really makes me craving to death for this one. Well, thank you for teaching us on how to wrap right this one. Job well done!
mags says
hi , i love this blog. I wonder if you know how to make the peanut butter like sauce that goes with this? at the Viet restaurants they always serve this will a sauce that taste like peanut butter with something othr ingredients.
Red Bottom says
Elegance spells tend to be the most crucial require of the youthful woman. These types of spells tend to be designed to cause you to stunning. Elegance is based on the actual eye from the beholder, because a few poet as soon as stated, however elegance spells tend to be something which can definitely enhance your own tone as well as elegance. Magick may be used to stimulate elegance inside the people. Elegance spells tend to be even more essential within the modern globe exactly where elegance is actually regarded as equal to achievement. The very first within elegance may be the very first within may, it is stated. All of the energy sits within the one which is actually the most amazing.
property inventory London says
What is the white one actually? It`s not a bred like in the dunner. Thank you.
Beats by Dr Dre sale says
Before you do any of the equipment that I have just suggeted to you, you should go see a jewelry and ask him some of the questions that I have just mentioned.
Beats by Dr Dre says
This exercise seems simple---almost too simple.
lacleMelp says
zZd chicago bears jerseys oTe http://unimpo.blog.com/2011/12/17/this-turn-is-the-chicago-bears-jerseys/
giay nu says
I'm on a really low fat diet and it is hard to find things to cook. But these were low fat (ie no oil) and very yummy, I grated the carrot which was much easier, and left out the bean sprouts. Also used steamed chicken breast to make them really healthy. Next time will try prawns. Boyfriend loved them too, which is good as he doesn't go much on my low fat diet!
Buy Valium Online says
I was working and suddenly I visits your site frequently and recommended it to me to read also. The writing style is superior and the content is relevant. Thanks for the insight you provide the readers!
Barramundi says
That's really cool that you had shared everything about HOW TO WRAP RICE PAPER ROLLS..By knowing all things of its making it feels good.. Thanks for the share..
marlon says
I love making rice paper rolls, I sometimes make them the night before for my lunch at work the following day.
Kristy says
Hello Mia, do u mean soak the rice paper in beer rather than water or do you mean dip it as a source? Is there a particular beer u recommend or does it depend on the filling? I love cooking with beer, very intrigued by this 🙂